Note
Go to the end to download the full example code.
Adding Chan-Vese Contours to an Image#
This example shows how to add a contour based on the chan-vese segmentation of the image.
The Chan-vese algorithm is a level set method for image segmentation. It is based on the Mumford-Shah functional and is designed to segment images without edges.
In this example, we will the ripplemapper.analyse module to segment the image and add the resulting contour to the image.
The CV segmentation is a more unreliable way to form the contours.
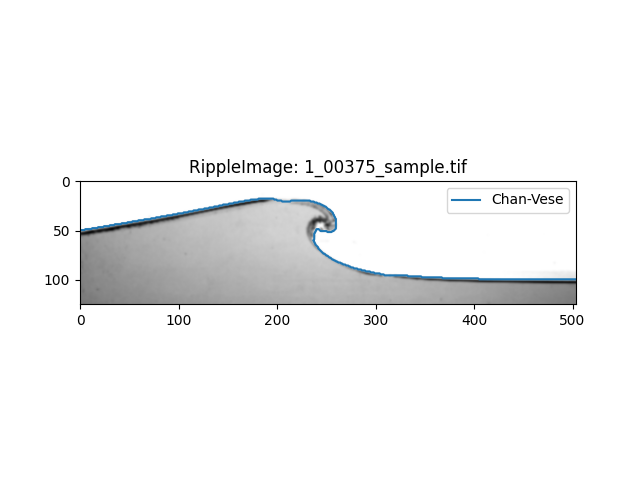
We can load an image into a RippleImage object using the RippleImage class and then run add_chan_vese_contours to add Chan-Vese contours to the image.
import matplotlib.pyplot as plt

from ripplemapper.analyse import add_chan_vese_contours
from ripplemapper.classes import RippleImage
from ripplemapper.data.example import example_data

ripple_img = RippleImage(example_data[2])
add_chan_vese_contours(ripple_img)
Plotting the image and its contours
ripple_img.plot(include_contours=True)
plt.show()
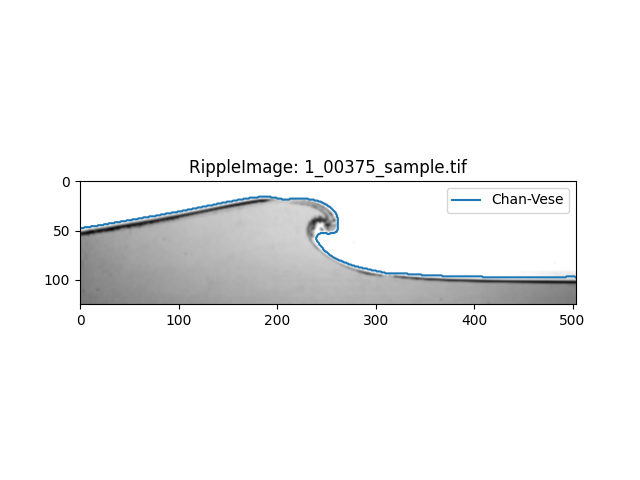
We can also add the Chan-Vese contours to a image where we use a combination of the divergence of the image and the regular image. This might improve the segmentation technique
add_chan_vese_contours(ripple_img, use_gradients=True, overwrite=True)
ripple_img.plot(include_contours=True)
plt.show()
/home/docs/checkouts/readthedocs.org/user_builds/ripplemapper/envs/latest/lib/python3.12/site-packages/ripplemapper/analyse.py:151: UserWarning: Overwriting Chan-Vese contour for image: /home/docs/checkouts/readthedocs.org/user_builds/ripplemapper/envs/latest/lib/python3.12/site-packages/ripplemapper/data/example/1_00375_sample.tif
  warnings.warn(f"Overwriting Chan-Vese contour for image: {ripple_image.source_file}")
Total running time of the script: (0 minutes 1.568 seconds)